Feeds:
Posts
Comments

Archive for the ‘Pies’ Category

Peaches ‘n Creme

Peaches 'n creme pie

Peaches ‘n creme pie

Believe it or not, I do bake things other than pies (more diverse posts coming this fall…). But for now, I’d like to continue to share some pie love with you.

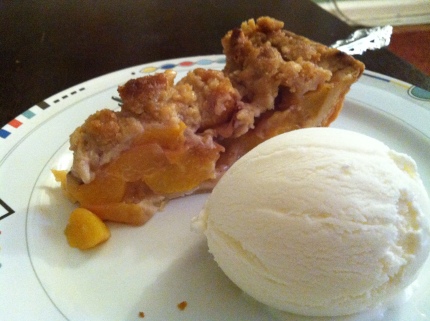
I recently bought some beautiful, local, last call for summer peaches and couldn’t wait to head to the kitchen with them. I’m a big fan of a traditional peach pie, but I wanted to try something a little different this time. These chilly mornings are making me crave creamy, comforting sweets (see Hoosier Sugar Cream Pie) and I had the idea to make some kind of peaches ‘n creme dessert. Mission accomplished. This creamy, fruity pie is the perfect combination for a late summer / early fall dessert.

Even though there are three layers to this pie, all are very simple, quick to prepare and well worth the effort. This pie is a looker too. The layers make each slice look fancy and indulgent. Enjoy!

Peaches ‘n Creme Pie
Yield – one, 9-inch pie

Ingredients
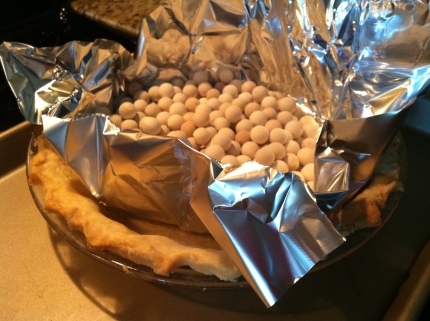
One single crust pie shell, rolled into a 9-inch pie plate and par-baked (with weights) at 400 degrees for 20 minutes (recipe here)
Crumble topping (recipe follows)
Cheesecake layer (recipe follows)
Peach filling (recipe follows)

Crumble topping
1 1/2 cups all-purpose flour
1 cup packed light brown sugar
10 tablespoons unsalted butter, cut into pieces and softened

Cheesecake layer
8 ounces cold cream cheese (not low fat)
1/3 cup of sugar
1 large egg
1 teaspoon vanilla extract
1/4 teaspoon salt

Peach filling
5 medium ripe peaches, pit removed and sliced into half inch slices (removing the peach skin is optional, I did)
2 tablespoons cornstarch
1/4 cup sugar
1 vanilla bean (optional), opened and scraped (bean discarded or saved for other use)

To make the layers
To make the crumble topping, mix together the flour and sugar in a medium bowl. Cut the soft butter into the flour mixture using a pastry blender or two forks until the mixture resembles coarse crumbs. Use your hands to make sure all ingredients are well combined. Set aside.

To make the cheesecake layer, beat the sugar and cream cheese in a mixer on medium speed until it’s smooth and creamy, 2-3 minutes. Add the egg, vanilla and salt  and continue to beat until all ingredients are incorporated and the mixture begins to thicken, 3-5 minutes. Set aside.

To make the peach filling, place peach slices in a large bowl. Sprinkle sugar, cornstarch and vanilla bean seeds over the peaches and stir until combined.

To assemble the pie
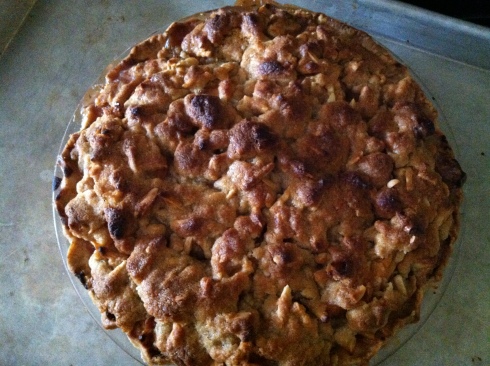
Preheat the oven to 350 degrees. Spread the cream cheese filling evenly over the bottom of the par-baked, cooled, pie crust. Carefully spread the peach filling over the cheesecake layer, making sure to create an even layer that is slightly mounded in the middle. Break up the crumble topping with your fingers and sprinkle the pieces over the fruit. Place the pie on a baking sheet and bake for 65-70 minutes, or until the crumble topping is golden brown.  Serve this pie at room temperature and store it in the refrigerator.

Read Full Post »

Hoosier Sugar Cream Pie

Hoosier Sugar Cream Pie

Welcome fall! That’s right, it’s September already. I’m embarrassed to see how much time has passed since my last post. For those of you wondering, yes, I’m still here! I promise to jump back on the blogosphere with renewed time and energy for the remainder of 2013.

I love pie any time of year. This summer I enjoyed a particularly ripe strawberry pie, which isn’t an easy find. Now I’m excited for cold season pies – cue Hoosier Sugar Cream Pie!

Also known as “desperation pie” and the official state pie of Indiana, a Hoosier Sugar Cream Pie is comprised of a simple and silky custard and single crust pastry. It dates back to the early 1800s as a go to farmers’ dessert once the apple bins were empty. Farmers would depend on their fresh milk and cream to make this simple sweet pastry. It’s still popular in Amish communities throughout the country and in plenty of bakeries and eateries across Indiana.

Despite its name, this custard pie isn’t overtly sweet. But it is American comfort food at its best and one of the easiest recipes I have ever made. For a fun twist, set your whisk aside and try the finger stirring method.

I used half and half in the recipe below, but you can use an equal part mixture of cream and milk if that’s what you have on hand. Use the highest quality dairy products for the best result.

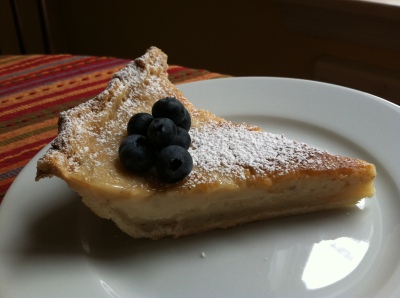
A traditional sugar cream pie has no particular finish. I used a light sprinkling of powdered sugar. You could also sprinkle some raw sugar on top of the custard and brulee it for a nice crunch. My husband says that this pie is best with fresh strawberries. You be the judge.


Hoosier Sugar Cream Pie
Yields one 9-inch pie or tart

Ingredients
1 ½ cups half n’ half
½ cup heavy cream
½ cup all-purpose flour
½ cup light brown sugar
½ cup white sugar
½ cup milk
1 teaspoon vanilla extract
Seeds from 1 vanilla bean
1/4 teaspoon nutmeg
One single crust pie recipe (half of the double crust recipe here)

Roll out the pie crust and fit it into a 9-inch pie pan or tart shell. Refrigerate for 30 minutes. Preheat your oven to 350 degrees. Line your pie crust with foil and pie weights, rice or beans. Blind bake the crust for 15 minutes, remove the foil and weights and set aside to cool. Keep your oven temperature at 350 degrees.

To make the custard, combine the flour, sugars, nutmeg and vanilla bean seeds in a large mixing bowl and whisk to combine. Add the half and half, cream, milk and vanilla extract and whisk just until combined (30 seconds). Do not over whisk the custard or the heavy cream will be begin to whip.

Pour the custard into your pre-baked pie crust and bake for approximately 60-70 minutes. The custard should still jiggle in the center and the top should just begin to get a light golden color. Cool completely and then refrigerate. Serve at room temperature with a light dusting of powdered sugar.

Read Full Post »

Summer peach pie

Peach pie

July is the perfect time for summer peaches. I found some fantastic Jersey peaches near Ocean City, NJ, for $1 a pound (not something you can find on the island of Manhattan) and since you need several pounds of peaches for this pie, it was a great find.

The subtle sweet flavor of summer peaches are a great canvas for a pie. I like to keep my peach pie relatively straight forward, as peach juice can easily be overpowered by stronger flavors (save your cinnamon for fall!).

I recently made this pie with an almond crumb topping. I would also be great as a traditional double crust pie. Enjoy!

Summer Peach Pie
Yields one 9-inch pie

Ingredients
One double crust dough recipe, or single crust (if using optional crumb topping recipe below), recipe here
3 pounds ripe local peaches (approximately 10), halved, pitted, and cut into 1/2-inch slices
2 tablespoons light-brown sugar
3 1/2 tablespoons all-purpose flour
1/8 teaspoon nutmeg

To pre-bake the pie crust
Preheat the oven to 425 degrees. Roll out ½ of a double crust pie dough recipe and pre-bake with pie weights for 20 minutes, as directed here. Set aside to cool. Keep oven preheated to 425 while you assemble the pie.

To assemble the pie
Combine the sugar, flour and nutmeg in a small bowl. Sprinkle the dry ingredients over the sliced peaches and gently toss until combine and peaches are coated. Pour the peaches into the prepared pie shell, mounding slightly in the center. Sprinkle the crumb topping over the peaches (recipe below) or roll out the second half of the pie dough, lay over the peaches, vent, brush with egg wash (one egg, beaten with a pinch of salt) and sprinkle with sugar.

Place the pie on foil lined baking sheet and place on a rack in the lower third of the oven. Cover the crust of the pie with foil to prevent it from burning while cooking.

Bake the pie at 425 degrees for 20 minutes, then turn the heat down to 375 degrees and bake for an additional 40- 50 minutes or until the pie is golden brown all over and the filling is bubbling over.

Cool the pie completely at room temperature and store, uncovered (to keep the topping crisp!) at room temperature. Enjoy within 48 hours, or refrigerate for a longer shelf life. Serve it with your favorite ice cream, or this recipe for Sour ice cream.

Crumb topping (optional)
1/2 cup all-purpose flour
1/2 cup light brown sugar
1/4 teaspoon salt
8 tablespoons butter, chilled and cut in pieces
1/2 cup slivered almonds (or other chopped nut of choice)

Combine the flour with the sugar and salt.  Add the cold butter and mix with your fingertips, gently crushing the bits of butter until they are broken into smaller pebbles and the mixture resembles a streusel. Gently toss in the nuts. Refrigerate until ready to use.

Peach pie with sour ice cream

Read Full Post »

Sweet cherry pie

Cherry pie

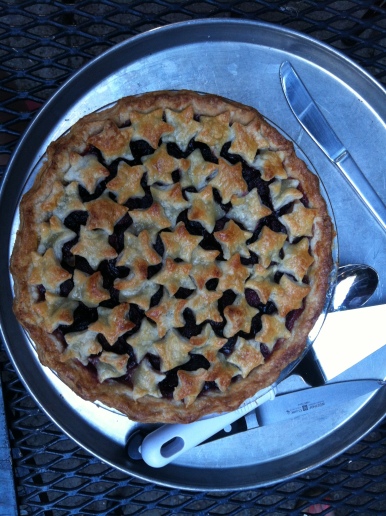
I love summer pies. From early summer berries to juicy stone fruit, there are so many options. I was contemplating what to make for a Fourth of July barbeque and realized I had never made a cherry pie. It sounded like a fun and festive challenge.

What I love about cherry pie is that the cherries hold their shape nicely throughout the cooking process. This pie won’t look like a mushy mess when you cut into it. The cherries cook through and release their juices without falling apart, making it a very attractive slice. Since cherries are a relatively juicy fruit, this double bake method works well for the crust.

A cherry pitter is a great tool to have, but it won’t save you the mess of cherry juice.  Pitting them by hand works just fine, especially if you’re lucky enough to have a volunteer who will split the task with you (thanks Tom!).

This is a great base recipe for you to play around with. Consider adding in another flavor you love, such as ginger, kirsh, almond extract, lemon zest, etc.  I went with a stars theme for the Fourth of July, but you can do a full top crust, lattice crust, or use any cookie cutter to cut out shapes and decorate the pie anyway you like.

Bon appétit!

Sweet Cherry Pie
Yields one 9-inch pie

Pie Ingredients
1 double crust pie dough separated into two disks, recipe here
5 cups fresh sweet cherries, pitted (about 2 ½ – 3 pounds unpitted)
4 1/2 tablespoons cornstarch
3/4 cup sugar
1/4 teaspoon salt
2 teaspoons of lemon juice
1 tablespoon cold unsalted butter, cut into small pieces
1 egg, beaten with a dash of salt
Sugar in the raw (or regular refined sugar), for sprinkling

To pre-bake the crust
Preheat the oven to 425 degrees. Roll out one disk of pie dough (1/2 the recipe) and pre-bake with pie weights, as directed here. Set aside to cool. Turn the oven down to 400 degrees.

To make the pie
Stir together the cherries, cornstarch, sugar, salt and lemon juice gently in a large bowl, set aside.

Once the pie crust is out of the oven, remove the pie weights and spoon in the cherry filling. Dot the top of the filling with small pieces of cold butter. Roll out the remaining disk of dough (or cut into shapes and lattice crust) and place over the filling, crimping the edges as desired. Make sure to vent the top crust with a couple of slits or openings. Brush the top of the pie with the egg wash and sprinkle with raw sugar.

I would recommend covering the crust of the pie with foil, like this, to prevent it from burning while cooking. You can choose to add the foil now, or keep an eye on the color of the crust and add the foil once its reach a desired golden brown color. I prefer the latter.

Bake the pie at 400 degrees for 25 minutes, then reduce the temperature to 350 degrees and bake for another 25 – 30 minutes, or until the crust is golden and you can see the filling bubble up. Remove the pie and cool completely on a rack.

Read Full Post »

Image

Blackberry pie

I can’t quite explain my recent interest in fruit pies, other than the fact that I can’t WAIT for summer and I’m in culinary school, which means I spend all of my time thinking about food.  Plus, I was beginning to feel like me and my kitchen aide mixer were in need of some serious bonding. Oh, and I had an extra round of dough leftover from last week’s pie fun, which left me with a serious urge to experiment further with crumb toppings.

While I would be perfectly happy eating a rhubarb pie each week for the rest of my life, I thought a new recipe might be appreciated among this audience. Also, I couldn’t justify another $20 spent on rhubarb (really?! $10 a pound NYC?).

I entered Trader Joe’s with an open mind and empty basket and left with loads of fresh blackberries, a couple of oranges, some really nice walnuts and a six pack of Simpler Times.

When I arrived home, I realized that I have never made a blackberry pie before. After gathering dozens of recipes and my online research, I dove right in.

I can now tell you from experience that blackberries are not to be overlooked when it comes to fruit pies. If you don’t believe me, take Mario Batali’s word for it.  They have a nice tart flavor that really balances out their naturally sweet juices.

Enjoy!

Blackberry pie
Yields one 9-inch pie

Pie Ingredients
1/2 recipe (one dough round) of pie dough, recipe here
6 cups fresh blackberries
1 1/2 tablespoons lemon juice
3/4 cup sugar
1/3 cup cornstarch
1 tablespoon orange zest

Preheat the oven to 425 degrees. Roll out pie dough and pre-bake with pie weights, as directed here. Set aside to cool. Turn oven up to 450 degrees.


Crumble Topping Ingredients
1/2 cup all-purpose flour
1/2 cup light brown sugar
1/4 teaspoon salt
1/2 teaspoon cinnamon
1 teaspoon ground ginger
8 tablespoons butter, chilled and cut in pieces
¾ cup chopped walnuts (optional, any desired nut will work)

Combine the flour with the brown sugar, salt, cinnamon and ginger.  Add the cold butter and mix with your fingertips, gently crushly the bits of butter until they are broken into smaller pebbles and the mixture resembles a streusel. Gently toss in the walnuts. Refrigerate until ready to use.

To Assemble the Pie
Toss the blackberries with the lemon juice in a large bowl. Set aside. In a small bowl, combine the sugar, cornstarch and orange zest. Sprinkle over the blackberries and toss until combined.

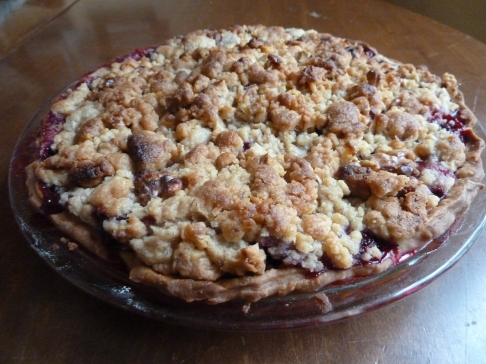
Pour the blackberry mixture into the prepared, slightly pre-baked pie crust, mounding blackberries slightly in the center of the pie. Sprinkle the streusel topping over the blackberries, slight pressing it in to secure it.

Place the pie on foil lined baking sheet and place on a rack in the lower third of the oven. I would recommend covering the crust of the pie with foil, like this, to prevent it from burning while cooking. You can choose to add the foil now, or keep an eye on the color of the crust and add the foil once its reach a desired golden brown color.

Bake the pie at 450 degrees for 15 minutes, then turn the heat down to 375 degrees and bake for an additional 45- 50 minutes or until the pie is golden brown all over and the filling is bubbling over.

Cool the pie completely at room temperature and store, uncovered (to keep the topping crisp!) at room temperature. Enjoy within 48 hours, or refrigerate for a longer shelf life.

Read Full Post »

Rhubarb pie with ginger crumble

Rhubarb – a sure sign that spring has sprung.  My mother-in-law, Virginia, first introduced me to Rhubarb Pie when I was a teenager. These days, I become a grocery store stalker as soon as April hits, waiting for the first sign of this long, pink vegetable. It’s an especially daunting task in NYC, where demand is high and supply always seems to be low.

It took me only three trips to find my first batch of spring rhubarb this year. Unfortunately, both A&P and Whole Foods disappointed, but Garden of Eden (a small market on 23rd street) had a fresh, untouched pile of beautiful, young rhubarb. I felt like the first person to cross the finish line as the cashier fumbled to find a code for this strange vegetable and then quizzed me about what it was and why I was buying it. Lucky for her, I was more than happy to share.

People tend to pair rhubarb with strawberries or other berries (Blubarb anyone? Yum!). Those of you who like a sweeter pie will especially love the flavor that natural berry juice can bring to this tart plant. Give this prize-winning Strawberry-Rhubarb Pie a try.

Personally, I love the flavor of a pure Rhubarb Pie. It’s easy to overpower the rhubarb with other berries or excessive sugar in hybrid pies. You’ll find that this recipe calls for just enough sugar to sweeten the rhubarb without eliminating its naturally tart flavor.

I love this streusel topping. It’s a nice cross between a pie and crumble – the best of both worlds. If you prefer a double crust pie, forgo the crumble recipe and use the full dough recipe below.

Pair this pie with unsweetened, freshly whipped cream or your favorite ice cream.  I love it with Ginger Ice Cream.

Happy spring everyone!


Twice-Baked Fluffy Pie Crust

Recipe adapted from Smitten Kitchen
Yields one double layer pie crust

Ingredients
1 cup very cold water
2 1/2 cups all-purpose flour
1 tablespoon sugar
1 1/4 teaspoons salt
2 sticks unsalted butter, chilled and cut into pieces

Instructions
Fill a cup with water and a few ice cubes. Set aside.

In a large bowl, whisk together the flour, sugar and salt until combined. Sprinkle the small pieces of chilled butter over the flour mixture. Using a pastry blender (or two forks), work the butter into the flour mixture until all of the butter pieces are the size of small peas and the mixture is combined and crumbly. It’s ok if the mixture is slightly uneven.

Drizzle 1/2 cup cold water over the flour mixture. Using a rubber spatula, gather the dough together. Add more water, one tablespoon at a time, if needed, to bring the dough together. Gather the mixture together with your hands into one neat mound.

Divide the dough into two even mounds and form each mound into disks. Wrap each disk in plastic wrap and chill in the refrigerator for 1-2 hours (or up to one week).

If you use the crumb topping, you will only need one disk of dough. Feel free to use the other disk for another pie, tart, or to make hand pies like these. The dough can stay in the refrigerator for a week or in the freezer for a month. Just make sure it’s tightly wrapped.

When you’re ready to make this pie, preheat the oven to 425 degrees. Place one dough disk on a lightly floured surface and roll into a 12 inch circle, about 3/8-inch thick. Transfer to a 9-inch pie place. Line dough with foil and weigh it down with pie weights, dry rice or dry beans. Bake until crust is light golden brown, approximately 20 minutes.

When you remove the crust from the oven, increase the oven’s temperature to 450 degrees (unless you are making a double crust pie, in which case you should turn the oven down to 375 degrees). While crust is baking, prepare the pie filling.


Ginger Rhubarb Pie
Yields enough filling for one, 9-inch pie

Ingredients
1 3/4 pounds (about 10 stalks) of rhubarb, ends trimmed, cut crosswise into ½ inch pieces, like these
1 cup sugar
2 1/2 tablespoons cornstarch
1/4 teaspoon cinnamon
1 teaspoon powdered ginger (optional)
Pinch of salt

Instructions
Place chopped rhubarb in a large bowl.  In a small bowl, combine sugar, cornstarch, cinnamon, ginger and salt. Sprinkle the dry ingredients evenly over the rhubarb and gently stir to evenly coat the rhubarb. Set bowl aside while you make the crumble.


Ginger Crumble
Topping

Yields enough topping for one, 9-inch pie 

Ingredients
1/2 cup all-purpose flour
1/2 cup light brown sugar
1/4 teaspoon salt
1/4 teaspoon cinnamon
1 teaspoon ground ginger
8 tablespoons butter, chilled and cut in pieces

Instructions
Combine the flour with the brown sugar, salt, cinnamon and ginger.  Add the cold butter and mix with your fingertips, gently crushly the bits of butter until they are broken into smaller pebbles and the mixture resembles a streusel. Set aside.

To Assemble the Pie
Gently stir the rhubarb filling to refresh it. Pour the filling into the pie shell and even it out with your fingers, slightly mounding it in the center. Sprinkle the streusel topping over the rhubarb, slight pressing it in to secure it.

Place the pie on foil lined baking sheet and place on a rack in the lower third of the oven. I would recommend covering the crust of the pie with foil, like this, to prevent it from burning while cooking. Feel free to add the foil now, or keep an eye on the color of the crust and add the foil once its reach a desired golden brown color.

Bake the pie at 450 degrees for 15 minutes, then turn the heat down to 375 degrees and bake for an additional 50- 60 minutes or until the pie is golden brown all over and the filling is bubbling over.

Cool the pie completely at room temperature and store, uncovered (to keep the topping crisp!) at room temperature. Enjoy within 48 hours, or refrigerate for a longer shelf life.

*NOTE – If you opt for a double layer pie, pre-bake the shell as instructed above, then turn the oven down to 375 degrees. The pie can be baked at 375 degrees for the duration, approximately 60-75 minutes.

Read Full Post »
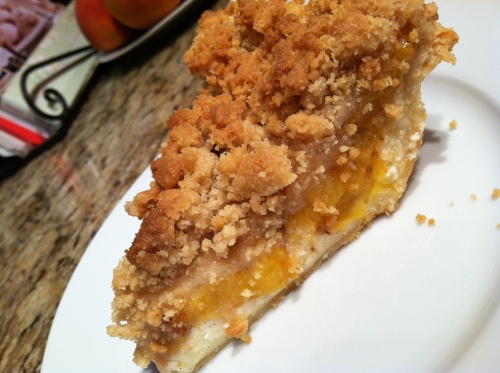
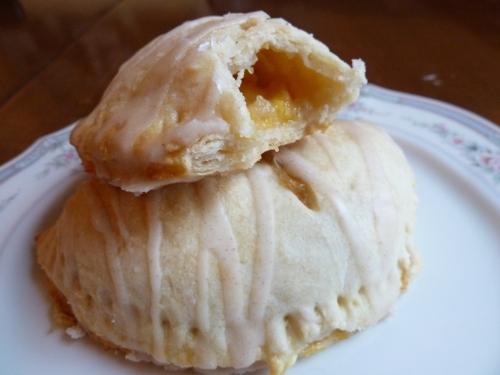
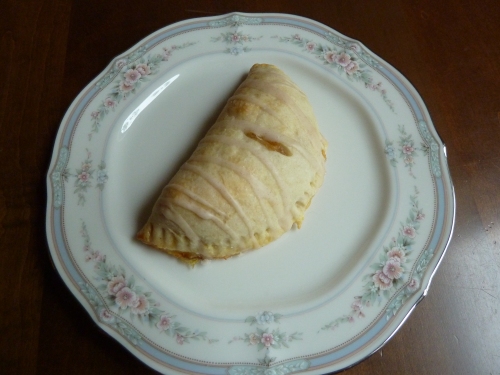
Bourbon peach hand pies with a cinnamon drizzle

You know I love pie, especially fruit pies and the juicy peaches at my local farmer’s market have been calling my name…

I wanted to kick things up a bit and make hand pies in place of a standard peach pie (although I nearly abandoned this plan after finding a terrific recipe for a ginger peach pie with a crumb topping…but that’s another blog post for another time).

I’ve never made hand pies before, but thought it might be similar to making calzones, which I do pretty regularly.  Yes, it’s true that the folding, crimping and slicing are the same, but pie dough is much more finicky than pizza dough.

I decided to use a recipe from Smitten Kitchen, one of my favorite blogs.  It was exactly was I was looking for – fresh peaches and bourbon – simple, straight-forward and delicious.

Jim Beam Kentucky Bourbon

As you’ll read in these very detailed instructions, there is significant chill time required after each step, which is the key to success for this recipe.  The chill time is what gives this dough its flaky, fluffy consistency that works perfectly with fruit pie filling.  It’s sturdy without being tough.

These pies would be great with a scoop of your favorite ice cream or fresh whipped cream. I mixed 1 cup powdered sugar with 2 tablespoons of milk and 1/2 teaspoon of cinnamon to make a cinnamon drizzle.  I though the sweet sugar topping balanced the pie well and the touch of cinnamon complemented the peach filling just perfectly.

If you love a strong bourbon flavor, substitute your favorite bourbon in place of the milk in the drizzle.  I prefer Jim Beam Kentucky Bourbon, which has a nice smoky flavor.

Bourbon peach hand pies with cinnamon drizzle

Happy peaching!

Read Full Post »

New jersey blueberry pie

So, it appears I’m on a bit of a fruit pie kick right now…I just can’t help myself! Blueberry is my favorite fruit pie and blueberries from New Jersey are among the best. Plus they’re in season right now and look incredible at my local farmer’s market.

Below is one of my favorite blueberry pie recipes. The hint of cinnamon and citrus really bring out the flavor of the blueberries without overpowering them. Feel free to substitute lemon zest and juice in place of the orange, if you prefer.

Cheers to summer berries!

Blueberry Pie
Serves 8-10 people

Ingredients
1 Twice-Baked Fluffy Pie Crust recipe
4 cups blueberries, from New Jersey if possible
1 tablespoon fresh orange juice
1/2 cup sugar, plus more for sprinkling
1/4 cup light brown sugar, packed
3 tablespoons cornstarch
1/2 teaspoon grated orange zest
1/4 teaspoon salt
1/4 teaspoon cinnamon
1 tablespoon cold unsalted butter, cut into small pieces
1 egg

Instructions
Follow these instructions to pre-bake the bottom pie crust. While the crust is baking, make the pie filling.

In a large bowl, combine the blueberries and orange juice. Toss to coat evenly.

In a small bowl, stir together the sugars, cornstarch, orange zest, salt and cinnamon. Sprinkle the sugar mixture over the blueberries and toss to distribute evenly.

New jersey blueberries

Remove bottom crust from oven and immediately transfer berry mixture to the pie pan. Mound filling in the pan and dot the top with pieces of cold butter and set aside. Bring the oven temperature down to 375 degrees.

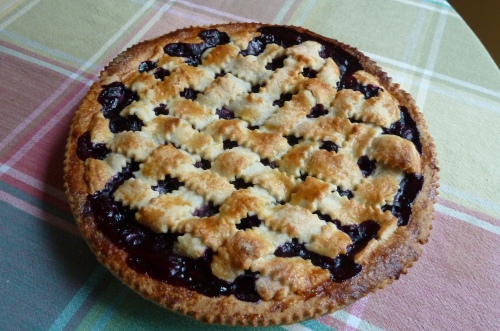
Remove the second dough disk from the refrigerator and roll out to an 11-inch circle on a lightly floured surface. Carefully position over the top of the pie. Trim and fold edges neatly. Alternatively, for a lattice crust (my favorite!) cut into strips and follow this guide.

Pie headed into the oven

Whisk the egg with a splash of water and brush egg wash over the unbaked pie dough. Sprinkle the wet dough with a light dusting of white or raw sugar.

Bake the pie until the crust is golden and the filling is thick and bubbly, approximately 50-60 minutes. Transfer to a wire rack and cool completely.

Serve at room temperature with whipped cream or a scoop of your favorite ice cream.

Read Full Post »

Prize-winning strawberry rhubarb pride pie

If you haven’t been to the Jazz Age Lawn Party on Governor’s Island, go.  Hosted by Michael Arenella and his Dreamland Orchestra, it’s a flashback to the 1920s with beautiful jazz, flapper dresses, lovely St. Germain cocktails and a rather competitive amateur pie contest.

Dance floor

You may remember that my very first blog post was about this event.  Specifically, it was my Peach Pie Cupcake recipe that won the “Bandleader’s Choice” category at the Jazz Age Lawn Party in 2010.

The beautiful Olivia

I’m excited to report that I took home another blue ribbon this year! My Strawberry Rhubarb Pride Pie won first place in the “Hobo’s Choice” category, which according to the pie judges, means it’s “so yummy that a hobo would want to steal it while it was cooling on a windowsill.”

Buffet of pies

I love rhubarb and this event was perfectly timed with rhubarb season. The secret to this pie is double baking the crust.  It keeps the bottom from getting soggy and is a great crust for any fruit or berry pie.

This was also my first time using tapioca in a pie, which works well for fruit that is particularly watery, such as strawberries. One tip when using tapioca – grind the already small granules in a coffee grinder in advance to make them as invisible as possible in the pie.

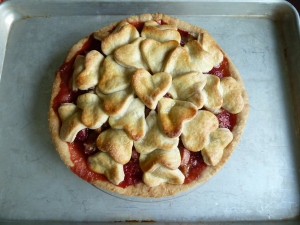
The Jazz Age Lawn Party was also one day after the Marriage Equality Act passed in New York, hence the beautiful hearts. This is my pride pie!

Enjoy this recipe when you can find rhubarb in at your local market. In the meantime, pack a picnic and head to the next Jazz Age Lawn Party August 20-21 on Governor’s Island.


Twice-Baked Fluffy Pie Crust

Recipe adapted from Smitten Kitchen
Yields one double layer pie crust

Ingredients
1 cup very cold water
2 1/2 cups all-purpose flour
1 tablespoon sugar
1 1/4 teaspoons salt
2 sticks unsalted butter, chilled and cut into pieces

Instructions
Fill a cup with water and a few ice cubes. Set aside.

Crust in the works

In a large bowl, whisk together the flour, sugar and salt until combined. Sprinkle the small pieces of chilled butter over the flour mixture. Using a pastry blender (or two forks), work the butter into the flour mixture until all of the butter pieces are the size of small peas and the mixture is combined and crumbly. It’s ok if the mixture is slightly uneven.

Drizzle 1/2 cup cold water over the flour mixture. Using a rubber spatula, gather the dough together. Add more water, one tablespoon at a time, if needed, to bring the dough together. Gather the mixture together with your hands into one neat mound.

Divide the dough into two even mounds and form each mound into disks. Wrap each disk in plastic wrap and chill in the refrigerator for 1-2 hours (or up to one week).

Preheat the oven to 425 degrees. Place one dough disk on a lightly floured surface and roll into a 12 inch circle, about 3/8-inch thick. Transfer to a 9-inch pie place. Line dough with foil and weigh it down with pie weights, dry rice or dry beans. Bake until crust is light golden brown, approximately 20-25 minutes. While crust is baking, prepare the pie filling.

Prize-Winning Strawberry Rhubarb Pride Pie
Recipe adapted from Smitten Kitchen
Yields 8-10 servings

Ingredients
Twice-Baked Fluffy Pie Crust recipe
3 1/2 cups (about 1 1/2 pounds, untrimmed) rhubarb, in 1/2-inch thick slices
3 1/2 cups (about 1 pound) strawberries, hulled and sliced if big, halved if tiny
1/3 cup sugar, plus more for sprinkling on top of pie
1/4 cup light brown sugar
1 tablespoon lemon juice
1/4 teaspoon salt
1/4 cup quick-cooking tapioca
2 tablespoons unsalted butter, cut into small pieces
1 large egg yolk

Rhubarb, cut into 1/2 inch pieces

Instructions
In a large bowl, combine the rhubarb, strawberries, sugars, lemon juice, salt and tapioca. Set aside until crust is out of the oven.

Rhubarb and strawberries

Remove the crust from the oven and change the oven temperature to 400 degrees. Remove the foil and pie weights and mound the filling on top of the bottom pie crust.  Dot with bits of unsalted butter.

On a lightly floured surface, roll out the second pie disk into an 11 inch circle and place on top of pie filling. Cut several decorate slits in it to release air while it cooks. Tuck rim of dough underneath itself and crimp it decoratively. Alternatively, use a cookie cutter to create shapes of dough and place them strategically on topic of the filling.

Pie heading into the oven

Transfer pie to a baking sheet. Combine egg yolk with 1 tablespoon of water and brush mixture over dough. Bake for 20 minutes then reduce temperature to 350 degrees and bake for an additional 25 to 30 minutes, until the pie is golden and the juices bubble visibly.

Hot out of the oven

Transfer pie to wire rack to cool completely before eating.

Words to live by...


Read Full Post »


peanut butter pie with chocolate cookie crust

When you write a baking blog, it makes baking a top priority.  Beyond parties, I’ll take any little excuse to get in the kitchen and try something new, or perfect a classic recipe.  Last weekend, the Albany Travers came down for a visit and with an equal appreciation for sweet treats, they are great people to bake for.

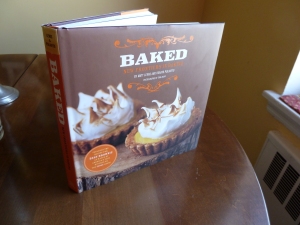
As many of you know, I’m working my way through Baked: New Frontiers in Baking, a great Christmas present from santa. Next up is Peanut Butter Pie, one of my favorite desserts and Tom’s evergreen answer when I ask “what should I make tonight?”

This Peanut Butter Pie recipe is very easy, and I love the addition of hot fudge atop this cold treat. The combination of cream cheese and peanut butter make this filling a winner.

The chocolate wafer cookies can be difficult to find at grocery stores, but they are worth the hunt.  In NYC, you can get them at Food Emporium or Fairway (I know, I’ve search every major grocery store in NYC and NJ).

I made a few changes to the original Baked recipe to make this dessert pop even more. I definitely plan to add this one to my secret stash of Peanut Butter Pie recipes.

Peanut Butter Pie with Cookie Crust
adapted from Baked: New Frontiers in Baking
yield: one 9-inch pie

For the chocolate cookie crust
30 chocolate wafer cookies, or 6 oz (look for Nabisco’s Famous Chocolate Wafer Cookies in the grocery store)
1 tablespoon sugar
6 tablespoons unsalted butter, melted

For the peanut butter filling
1/2 cup or 3 oz of semisweet chocolate chips
8 oz ream cheese, at room temperature
1 cup creamy peanut butter
2 tbsps pure vanilla extract
3/4 cup firmly packed dark brown sugar
1 1/2 cups heavy cream

For the easy hot fudge sauce
6 oz milk chocolate, finely chopped
6 oz dark chocolate, finely chopped
1 cup heavy cream
1/4 cup light corn syrup

Make the chocolate cookie crust
In a food processor, grind the cookies to a very fine powder. You should have about 1 1/2 cups.

cookies in food processor

Put the crumbs in a bowl and stir in the sugar.

sugar and chocolate cookie crumbs

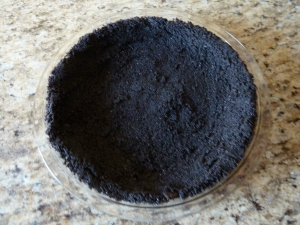
Pour the butter over the crumb mixture and mix until well combined. The mixture will feel wet. Turn the crumb mixture out into a 9-inch pie plate and press it into the bottom and up the sides. You can use the back of a large spoon to even out the crust.

chocolate cookie crust

Put the crust in the refrigerator while you make the filling.

Make the peanut butter filling with chocolate bottom
Melt the chocolate chips in a microwave oven or in a double boiler. Use a spatula to spread the chocolate in a thin layer on the bottom of the chilled pie crust. Put the crust back in the refrigerator while you make the peanut butter filling.

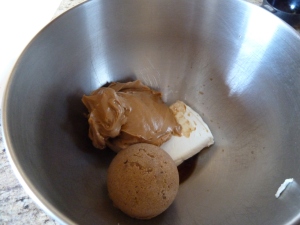
Put the cream cheese, peanut butter, vanilla, and brown sugar in the bowl of an electric mixer fitted with the paddle attachment.  Beat on medium speed until well combined and completely smooth.  Set aside.

peanut butter filling ingredients

In a clean bowl, use the the mixer fitted with the whisk attachment to whip the cream until soft peaks form. Remove the bowl from the mixer and, with a rubber spatula, gently fold the whipped cream into the peanut butter mixture until the mixture is uniform in color.

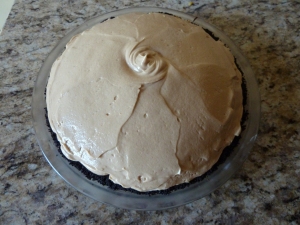
peanut butter filling

Pour the mixture into the prepared crust and refrigerate for at least four hours.

Make the easy hot fudge sauce

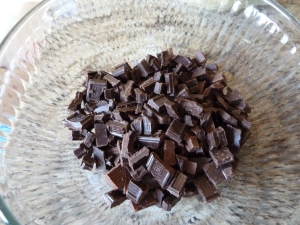
Place both chocolates in a medium heatproof bowl and set aside.

chocolate for hot fudge

In a small saucepan, bring the cream to a simmer over medium heat. Add the corn syrup and stir to combine. Remove from the heat and pour over the chocolates. Let the mixture sit for two minutes. Starting in the center of the bowl and working your way out to the edges, whisk the chocolate mixture in a circle until completely smooth. The hot fudge sauce, cooled to room temperature and covered tightly, will keep for three days in the refrigerator. Rewarm the sauce in a microwave oven on medium heat for 30 seconds, stir, repeat until the sauce is warm; or reheat it in a small saucepan over low heat.

Place a piece of pie on a large serving plate and spoon three heaping tablespoons of the warm sauce directly over the top of the pie.  Eat and enjoy immediately.

Baked: New Frontiers in Baking

Read Full Post »

Older Posts »