Feeds:
Posts
Comments

Archive for November, 2011

Pumpkin mousse tart

With 70 degree weather in late November, it doesn’t feel much like fall in NYC, but it’s certainly starting to taste like it.

As the holidays approach, and you begin narrowing down all of your winter recipes to just a few lucky picks for holiday entertaining, I wanted to share a terrific pumpkin recipe for consideration.

This Pumpkin Mousse Tart is a refreshing twist on the classic pie, with a light, flavor-packed filling and to-die-for cookie crust. It would be an impressive centerpiece for any holiday party or intimate dinner.

While this was originally a Martha Stewart recipe (I made a few alterations here and there), this dish does require some attention and skill. It’s not something I would recommend to a beginner. But, if you’re bored with the same old pie and cookies, this could be a fun and rewarding challenge.

We make mousses a lot in culinary school. And while those experiences are fresh in my mind, I included some thoughts, comments and tips that should be helpful for a first timer.

This recipe calls for a 10 inch tart pan, however, an 8 or 9 inch will do just fine. I used a 9 inch pan and used the leftover cookie crumbs and mousse to make two parfaits. Yum.

Happy baking!

Pumpkin Mousse Tart
Adapted from Martha Stewart Living, November 1997
Yields one, ten inch tart

Ingredients
9 ounces graham crackers
1/3 cup, plus 2 tablespoons, plus 3/4 cup granulated sugar
3 tablespoons cocoa powder
3/4 teaspoon ground cinnamon, plus more for dusting
1/4 teaspoon ground nutmeg
12 tablespoons unsalted butter, melted
1/4 cup liquor or liqueur of choice (brandy works well here, I used Kentucky bourbon)
2 tablespoons unflavored powdered gelatin
3 large eggs, room temperature
1 1/2 cups canned Pumpkin Puree (not to be confused with pumpkin pie mix!)
1/4 teaspoon ground allspice
1/4 teaspoon ground ginger
1/2 teaspoon salt
1/4 cup sour cream
1 1/2 cups heavy cream
1/2 teaspoon vanilla extract

Directions
Heat oven to 325 degrees. In a food processor, combine graham crackers, 1/3 cup plus 2 tablespoons granulated sugar, cocoa powder, 1/4 teaspoon cinnamon, and pinch nutmeg and process until finely ground. Transfer the mixture to a medium bowl and mix in melted butter with a wooden spoon until evenly moistened. Press mixture evenly onto bottom and sides of a 10-inch tart pan and bake until set, 15 -18 minutes. Set crust aside to cool.

Combine liquor and 2 tablespoons water in a small bowl. Sprinkle gelatin powder evenly over liquid and set aside to soften for approximately 10 minutes.

Bring a small pot filled with 1-2 inches of water to a boil.  Meanwhile, in the bowl of an electric mixer fitted with the whisk attachment, beat eggs on medium-high speed until mixture is pale yellow and fluffy (approximately 5 minutes). While the mixer is running, combine remaining 3/4 cup sugar and 1/4 cup water in a small saucepan over medium-high heat. Brush any sugar crystals from the side of the pan with a wet pastry brush. Cook, without stirring, until temperature registers 225 degrees (soft ball stage) on a candy thermometer, about 5 minutes. Immediately turn mixer to high speed. Carefully drizzle sugar mixture down the side of the mixing bowl in a thin stream while the mixer is on high. DO NOT pour the sugar mixture directly in the whisk or the mixture will harden immediately and create spun sugar. When all of the sugar has been added, continue to beat for another 5 minutes or until mixture increases in volume, is pale yellow, and nearly room temperature (careful! Your mixing bowl will be very hot after adding the sugar).

While the egg and sugar mixture is beating, melt the gelatin mixture by placing the bowl over the pot with simmering water. Stir until the gelatin has melted and completely dissolved. Add the gelatin to the egg and sugar mixer and continue beating until the mixture reaches room temperature. Turn the mixer off.

In a large bowl, combine the pumpkin puree, remaining 1/2 teaspoon cinnamon, 1/4 teaspoon nutmeg, allspice, ginger, salt and sour cream.  Carefully fold the egg mixture into the pumpkin mixture with a rubber spatula, just until combined.

Fill the pie crust with the chocolate mousse (if you are using an 8 or 9 inch pan, you will have extra mousse – only fill to the top of the crust).  Refrigerate the tart until the mousse has set, at least four hours or overnight.

Before serving, whisk the heavy cream to soft peaks and then add the vanilla. Continue whipping the cream to medium peaks. Using a star tip, pipe the whipped cream onto pie in rosettes, shells or another decoration of choice.  Alternatively spread the whipped cream evenly over the top of the pie with a spatula. Lightly sift cinnamon over the top of the whipped cream. Chill until ready to serve.

Mark & Nancy celebrate 35 years with a pumpkin mousse tart!

Read Full Post »

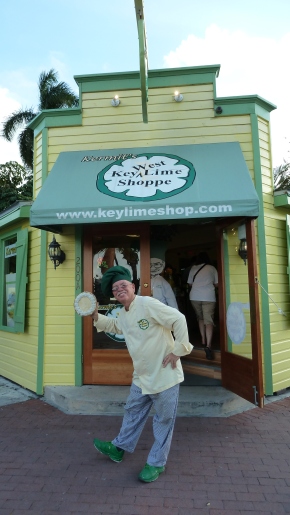
Kermit, outside of Kermit's Key West Key Lime Pie Shoppe

While you are all dreaming of pumpkins and pecans, I have key limes on my mind. I just returned from a fantastic trip to the Florida Keys, thanks to two friends of mine who decided to “tie the knot” in this lovely place.  A perfect opportunity to embark on a key lime pie crawl!  And I did just that.

While I didn’t have time to venture too far off the beaten path in some of the more obscure keys (my journey includes mainly Key West, one in Key Largo and one in Marathon), this NY Times article offers a few additional spots to consider.

Everyone claims to have "the original" or "award winning" slice of key lime pie

This trip made me realize that Key Lime Pie is very personal. Everyone has their own idea of what key lime pie should taste like and how much it should cost. While my husband Tom will tell you that he only likes to pay around $4 for his Key Lime Pie, he later conceded that the $9.50 slice might have been the best we tasted. We found that slice prices ranged from $3 – 10.

I was under the impression that Key Lime Pie is traditionally topped with fresh meringue and was surprised to find that so many restaurants in Key West serve it with a few dollops of whipped cream.  This article about the history of Key Lime Pie agrees. In my opinion, they are all great for different reasons.

Whether you prefer a pie tart or mild, creamy or custardy, topped with meringue or whipped cream and finished with a graham cracker or cookie crust, the Florida Keys have something to offer every pie lover. Many of the below companies even ship their pies nationwide!

Key lime pie from Sundowner, Key Largo

My first stop was in Key Largo at Sundowner, a casual seafood restaurant right on the water. After indulging in an all-you-can-eat fried mahi Friday night special, a slice of Key Lime Pie sounded perfect. It was tart with a grainy cookie crust and topped with fresh meringue. The perfect start to vacation.

Key lime pie at Commodore

My next taste was at Commodore restaurant in the historic seaport neighborhood of Key West. This was also the site of Kristie and Mark’s rehearsal dinner. Of course, the grand finale was a rich slice of Key Lime Pie, which I loved. It was distinctly tart, with a fine graham cracker crust, a few dollops of freshly whipped cream and a key lime twist.

Key lime pie from Kermit

Kermit was the inventor of the Key Lime Pie on a stick, which is a slice of key lime pie, dipped in chocolate and frozen. Sounds great. I stuck with tasting a traditional slice from Kermit’s Key West Key Lime Pie Shoppe, which had a great tart taste and nice crust.  Kermit sells nearly everything key lime, from ice cream and cookies to wine and shampoo. It’s a really fun shop to explore.

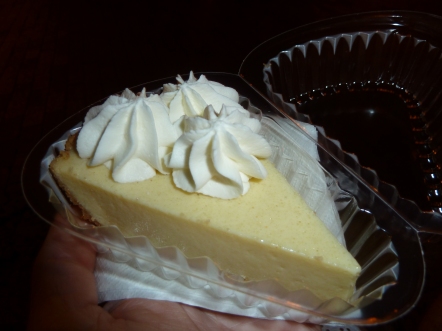
Key lime pie from Key Lime Pie Co.

Just a few blocks down the road is Key Lime Pie Company, who recently battled Bobby Flay in a Key Lime Pie Throwdown. While Bobby Flay took home the pie crown, this slice certainly has lots to offer, including a super creamy texture that was very different from most slices I tried and a very mild key lime taste. I like to think of this as a great gateway slice.

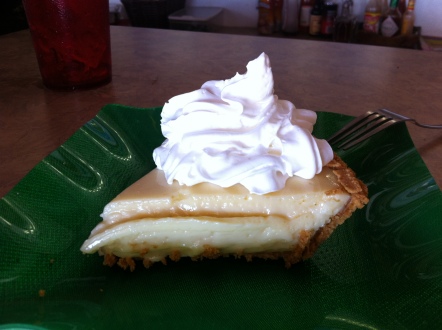
Key lime pie from Blue Heaven

We had to check out Blue Heaven. This former brothel turned restaurant has become famous for their “mile high” slices of Key Lime Pie. At $9.50 per slice, we weren’t sure what to expect. This turned out to be my favorite slice of the trip – super moist and thick grainy crust, a perfectly balanced key lime flavor and lots of fresh meringue topping. Yum. Beyond their pie, Blue Heaven is a great restaurant and offers live Caribbean music in their outdoor beach area. It’s definitely a place to relax and unwind in Key West.

Key lime pie from Seven Mile Grill

Our last slice of the trip was in Marathon, just north of the famous Seven Mile Bridge at Seven Mile Grill. Oddly enough, we actually went to this small, local outpost for a slice of their Peanut Butter Pie, which received fantastic ratings in a guidebook I referred to throughout the trip. After indulging in some amazing local food that included a chili dog and massive crabcake sandwich, we found out that they were out of peanut butter pie. The server assured us that their Key Lime Pie was not to be missed. It was a tasty ending to a great trip.

Kristie & Mark - the reason I came to Key West

Read Full Post »

Tarte tatin

Puff pastry was a fantastic unit.  It’s the base for so many great desserts, from croissants and tarts to napoleons and palmiers.  The method for creating puff pastry, or Pate Feuilletee , isn’t particularly difficult, but it is time consuming and the dough is very sensitive to temperature.  Your working environment needs to be just right.  I’m a little nervous to replicate these recipes in my own kitchen, but that won’t stop me from trying!

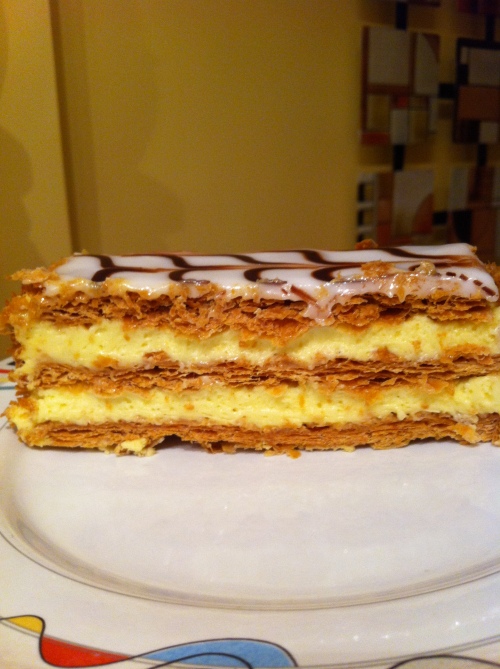
Classic napoleon

We learned three different types of puff pastry – quick, classic and inverse – and the proper use for each type of dough. We had a lot of fun with recipes in this unit, and I was really excited to build on this foundation for our next unit which would finally include croissants.

Pineapple pistachio tart and napoleon cake

Pears in a cage

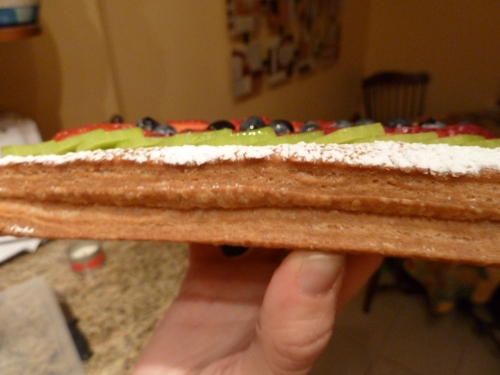
Puff pastry is about creating hundreds of layers of butter and dough, by combining the dough and butter, rolling them together, folding the package in a certain way, rolling it out again, folding it again, etc. etc.  It takes a while, but the end product is well worth the effort.

Fresh fruit tart

This photo offers a great view of the butter and dough layers.  It was so crispy and flaky.  Yum…

Conversations - almond tartlets

These tartlets were quite weird looking (they bake up so high!) but tasted fantastic!  They were filled with almond cream and so delicious.

Read Full Post »