Feeds:
Posts
Comments

IMG_3940

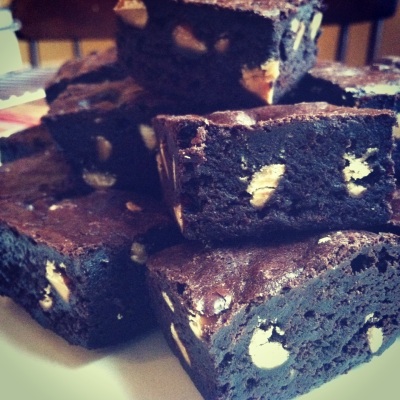
In my opinion, chocolate desserts are fabulous any time of year. But there’s something about cold, sub-zero temperatures that make you want to cozy up with loads of warm cocoa treats. In the spirit of the current NYC blizzard, I wanted to share this fantastic 5-minute brownie recipe from Smitten Kitchen.

Not only is this recipe quick and easy, these brownies have a fantastic texture that make them picture perfect.

They will turn out just fine with standard cocoa, but the higher the quality of cocoa you use, the better they will be. I used a beautifully dark Valrhona cocoa powder for this batch and threw in some peanut butter chips. Voila!


Best Cocoa Brownies

Adapted from Alice Medrich’s Bittersweet, via Smitten Kitchen
Makes approximately 16 brownies

Ingredients
10 tablespoons (140 grams) unsalted butter
1 1/4 cups (250 grams) sugar
3/4 cup plus 2 tablespoons (65 grams, though some brands may weigh more) unsweetened cocoa powder (natural or Dutch-process)
1/4 teaspoon salt (or a heaping 1/4 teaspoon flaky salt, as I used)
1/2 teaspoon pure vanilla extract
2 large eggs, cold
1/2 cup (65 grams) all-purpose flour
2/3 cup (75 grams) of nuts, chocolate chips, or other ingredient of choice

Procedure
Position a rack in the lower third of the oven and preheat the oven to 325°F. Line the bottom and sides of an 8×8-inch square baking pan with parchment paper or foil, leaving an overhang on two opposite sides.

Combine the butter, sugar, cocoa, and salt in a medium heatproof bowl and microwave for 30 seconds at a time, stirring in-between, until the butter is melted and all ingredients are warm and combined (approximately 2 minutes). The mixture will be gritty and should be warm (if hot, set aside for 5 minutes).

Stir in the vanilla with a wooden spoon. Add the eggs one at a time, stirring vigorously after each one. When the batter looks thick, shiny, and well blended, add the flour and stir until you cannot see it any longer, then beat vigorously for 40 strokes with the wooden spoon or a rubber spatula. Stir in the nuts or chocolate, if using. Spread evenly in the lined pan.

Bake until set and a toothpick plunged into the center emerges slightly moist with batter, approximately 35 minutes . Let cool completely on a rack.

For clean and easy cutting, freeze the brownie pan, remove and cut while frozen. Let come to room temperature before enjoying.

Peaches ‘n Creme

Peaches 'n creme pie

Peaches ‘n creme pie

Believe it or not, I do bake things other than pies (more diverse posts coming this fall…). But for now, I’d like to continue to share some pie love with you.

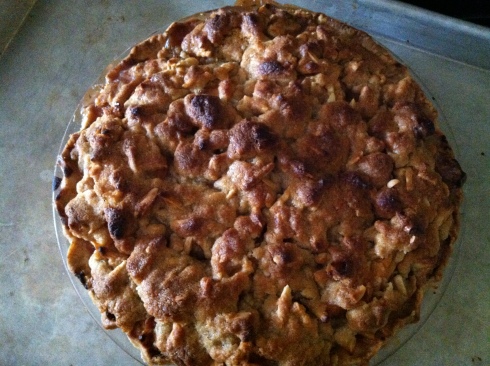
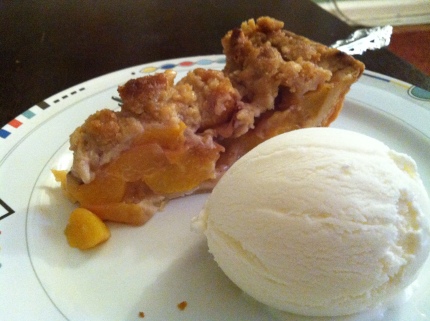
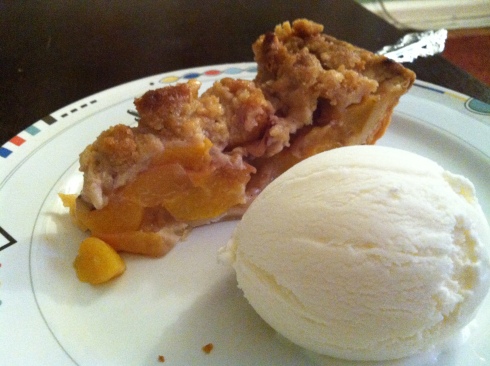
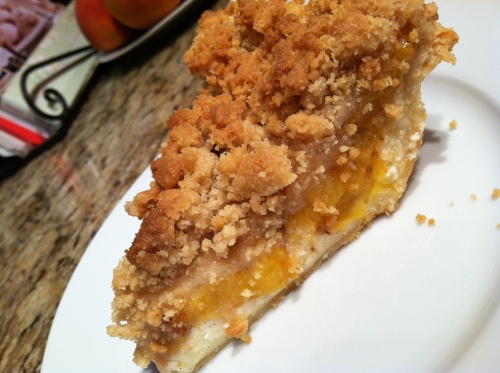
I recently bought some beautiful, local, last call for summer peaches and couldn’t wait to head to the kitchen with them. I’m a big fan of a traditional peach pie, but I wanted to try something a little different this time. These chilly mornings are making me crave creamy, comforting sweets (see Hoosier Sugar Cream Pie) and I had the idea to make some kind of peaches ‘n creme dessert. Mission accomplished. This creamy, fruity pie is the perfect combination for a late summer / early fall dessert.

Even though there are three layers to this pie, all are very simple, quick to prepare and well worth the effort. This pie is a looker too. The layers make each slice look fancy and indulgent. Enjoy!

Peaches ‘n Creme Pie
Yield – one, 9-inch pie

Ingredients
One single crust pie shell, rolled into a 9-inch pie plate and par-baked (with weights) at 400 degrees for 20 minutes (recipe here)
Crumble topping (recipe follows)
Cheesecake layer (recipe follows)
Peach filling (recipe follows)

Crumble topping
1 1/2 cups all-purpose flour
1 cup packed light brown sugar
10 tablespoons unsalted butter, cut into pieces and softened

Cheesecake layer
8 ounces cold cream cheese (not low fat)
1/3 cup of sugar
1 large egg
1 teaspoon vanilla extract
1/4 teaspoon salt

Peach filling
5 medium ripe peaches, pit removed and sliced into half inch slices (removing the peach skin is optional, I did)
2 tablespoons cornstarch
1/4 cup sugar
1 vanilla bean (optional), opened and scraped (bean discarded or saved for other use)

To make the layers
To make the crumble topping, mix together the flour and sugar in a medium bowl. Cut the soft butter into the flour mixture using a pastry blender or two forks until the mixture resembles coarse crumbs. Use your hands to make sure all ingredients are well combined. Set aside.

To make the cheesecake layer, beat the sugar and cream cheese in a mixer on medium speed until it’s smooth and creamy, 2-3 minutes. Add the egg, vanilla and salt  and continue to beat until all ingredients are incorporated and the mixture begins to thicken, 3-5 minutes. Set aside.

To make the peach filling, place peach slices in a large bowl. Sprinkle sugar, cornstarch and vanilla bean seeds over the peaches and stir until combined.

To assemble the pie
Preheat the oven to 350 degrees. Spread the cream cheese filling evenly over the bottom of the par-baked, cooled, pie crust. Carefully spread the peach filling over the cheesecake layer, making sure to create an even layer that is slightly mounded in the middle. Break up the crumble topping with your fingers and sprinkle the pieces over the fruit. Place the pie on a baking sheet and bake for 65-70 minutes, or until the crumble topping is golden brown.  Serve this pie at room temperature and store it in the refrigerator.

Hoosier Sugar Cream Pie

Hoosier Sugar Cream Pie

Hoosier Sugar Cream Pie

Welcome fall! That’s right, it’s September already. I’m embarrassed to see how much time has passed since my last post. For those of you wondering, yes, I’m still here! I promise to jump back on the blogosphere with renewed time and energy for the remainder of 2013.

I love pie any time of year. This summer I enjoyed a particularly ripe strawberry pie, which isn’t an easy find. Now I’m excited for cold season pies – cue Hoosier Sugar Cream Pie!

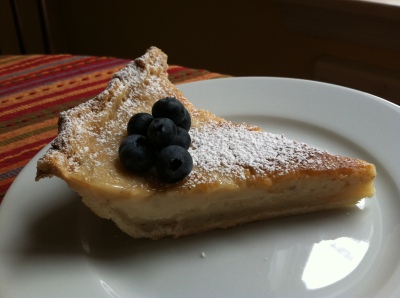
Also known as “desperation pie” and the official state pie of Indiana, a Hoosier Sugar Cream Pie is comprised of a simple and silky custard and single crust pastry. It dates back to the early 1800s as a go to farmers’ dessert once the apple bins were empty. Farmers would depend on their fresh milk and cream to make this simple sweet pastry. It’s still popular in Amish communities throughout the country and in plenty of bakeries and eateries across Indiana.

Despite its name, this custard pie isn’t overtly sweet. But it is American comfort food at its best and one of the easiest recipes I have ever made. For a fun twist, set your whisk aside and try the finger stirring method.

I used half and half in the recipe below, but you can use an equal part mixture of cream and milk if that’s what you have on hand. Use the highest quality dairy products for the best result.

A traditional sugar cream pie has no particular finish. I used a light sprinkling of powdered sugar. You could also sprinkle some raw sugar on top of the custard and brulee it for a nice crunch. My husband says that this pie is best with fresh strawberries. You be the judge.


Hoosier Sugar Cream Pie
Yields one 9-inch pie or tart

Ingredients
1 ½ cups half n’ half
½ cup heavy cream
½ cup all-purpose flour
½ cup light brown sugar
½ cup white sugar
½ cup milk
1 teaspoon vanilla extract
Seeds from 1 vanilla bean
1/4 teaspoon nutmeg
One single crust pie recipe (half of the double crust recipe here)

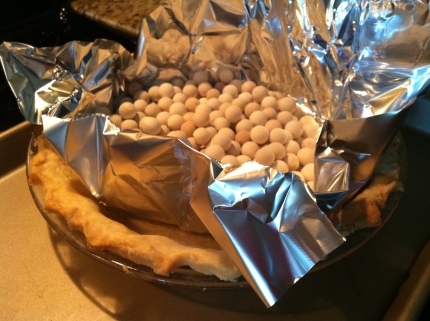
Roll out the pie crust and fit it into a 9-inch pie pan or tart shell. Refrigerate for 30 minutes. Preheat your oven to 350 degrees. Line your pie crust with foil and pie weights, rice or beans. Blind bake the crust for 15 minutes, remove the foil and weights and set aside to cool. Keep your oven temperature at 350 degrees.

To make the custard, combine the flour, sugars, nutmeg and vanilla bean seeds in a large mixing bowl and whisk to combine. Add the half and half, cream, milk and vanilla extract and whisk just until combined (30 seconds). Do not over whisk the custard or the heavy cream will be begin to whip.

Pour the custard into your pre-baked pie crust and bake for approximately 60-70 minutes. The custard should still jiggle in the center and the top should just begin to get a light golden color. Cool completely and then refrigerate. Serve at room temperature with a light dusting of powdered sugar.

Apple fritters

IMG_0945[1]

I don’t consider myself much of a collector, but if there was one thing I could easily amass it would be cookbooks. For me, getting a new cookbook is a process. First I browse the pages, admiring the design, layout and beautiful photography. Next I read it, cover to cover, before finally diving in to try out my first recipe.

I received several cookbooks for Christmas (yay!). My first experiment was with Karen DeMasco’s The Craft of Baking. It’s a beautiful book that’s chock full of helpful base recipes, creative variations and fun background stories about her tastings and travels throughout the craft world. There are a lot of recipes that I want to try out here, but I started with Apple Fritters.

I was looking for an easy dessert for an ordinary weeknight and that’s exactly what this recipe is. We all know that anything fried is best eaten that same day, well, pretty much right away, like while it’s still hot – yum! This recipe makes just enough for 4-6 people and requires ingredients that you probably have in your pantry right now.

Pair it with your favorite ice cream and its fancy enough for a dinner party. Bon appétit!

IMG_0966[1]

Apple Fritters
Adapted from The Craft of Baking
Makes 8-10 doughnuts

Ingredients
¾ cup, plus 2 tablespoons of all-purpose flour
¼ cup, plus 7 tablespoons of sugar
1 ½ teaspoons of ground cinnamon
Kosher salt
2 large eggs, separated
1 ½ teaspoons unsalted butter, melted
1 teaspoon vanilla extract
½ cup beer (pilsner or lager preferably)
1 large firm baking apple, such as granny smith, mutsu or crispin
Oil for frying (peanut oil is great but canola oil works just fine)

To make the fritters
In a medium bowl, whisk together the flour, ¼ cup of sugar, ¾ teaspoon of the cinnamon and 1 teaspoon salt.

In a large bowl, whisk together the egg yolks, butter and vanilla. Whisk in 1/3 of the flour mixture, then one third of the beer, alternating until combined in three additions. Whisk well to combine, then set the batter aside for 30 minutes to rest.

Peel core and slice the apple into 10, 1/8-inch thick rings. Spread out the rings on a plate. Combine 1 tablespoon of sugar with ¼ teaspoon of cinnamon and sprinkle over the apple slices. Let the slices sit for 20 minutes as they absorb the sugar.

In a wide, shallow bowl, mix together the remaining 6 tablespoons of sugar, ½ teaspoon of cinnamon and a pinch of salt. Set aside.

Fill a high-sided pot with 2 inches of oil and begin heating to 375 degrees F. Meanwhile, whisk the egg whites to soft peaks and gently, but thoroughly, fold them into the batter.

Once the oil is ready, in batches dip the apple rings into the batter to coat both sides and fry, turning once, until the fritters are golden and crisp, about 3 minutes total. Drain them on a paper towel before immediately tossing them in the cinnamon-sugar mixture. Serve warm.

Extracts

IMG_0737[1]

For Christmas I always make some form of homemade food present for my friends and family. The first year of my adulthood I made tins full of Christmas cookies. I loved the process of setting aside two days close to Christmas and turning my kitchen upside down with 10-12 different types of cookies. It felt so festive. I kept the cookie tins going for a few years, but eventually job responsibilities took over and I began to have less and less time to bake close to the holidays.

This year I needed an idea that was easy to execute and not as perishable as cookies, since I would be seeing different groups of people at different times. The answer – Extracts! I wanted to make my own extracts for a few years now but had never tried.

For Christmas 2012, I made vanilla and peppermint extracts. This is a great gift for the holidays, or any time of year. It’s incredibly easy and will definitely impress the recipient. It just requires some advance thinking, as the brewing process takes 4-8 weeks. I purchased small bottles from Amazon and made my own labels. If you’re giving these away as gifts, I would recommend using one or two ounce bottles. Amazon is also a great place to purchase vanilla beans.

For your friends who are more adventurous in the kitchen, you can easily vary this base recipe to make orange or lemon extracts by using the peel of the fruit or nut extracts by using whole, skinned nuts. The sky is the limit!

Vanilla Extract
Makes 1 ½ cups of extract, or enough to fill two small mason jars

Ingredients / equipment
8 vanilla beans
1 ½ cups of your favorite vodka (I used Svedka)
2 small mason jars with lids

To make the extract
Split each vanilla bean in half lengthwise and scrape out the beans. Add the beans and bean stems of 4 vanilla beans to each mason jar. Split the vodka between two mason jars, filling each with approximately ¾ cup. Seal the jar and place in a cool, dark cabinet for 4-8 weeks. Shake the jars a few times a week to redistribute the flavor.

Peppermint Extract
Makes 1 ½ cups of extract, or enough to fill two small mason jars

Ingredients / equipment
Bunch of fresh mint leaves
1 ½ cups of your favorite vodka (I used Svedka)
2 small mason jars with lids

To make the extract
Bruise a handful of the fresh mint leaves by roughly pulling the leaves apart with your fingers. Fill each mason jar about ¾ of the way with the leaves. Split the vodka between two mason jars, filling each with approximately ¾ cup of vodka. Seal the jar and place in a cool, dark cabinet for 4-8 weeks. Shake the jars a few times a week to redistribute the flavor.

IMG_0962[1]

Sour cream-chocolate cake

Coming home to the arrival of a new cookbook is one of the best feelings. The crisp new pages, gorgeous photos, baking tips and tidbits – I can’t wait to jump right in.

Through Smitten Kitchen, I recently discovered Sky High, a book dedicated to modern American layer cakes. This book is loaded with simple and interesting triple layer recipes. I was immediately drawn to the recipe for a Sour Cream-Chocolate Cake with Peanut Butter Frosting and Peanut Butter Chocolate Glaze. This is a great oil-based chocolate cake recipe and the addition of sour cream makes the cake super moist. The peanut butter frosting is phenomenal and the chocolate glaze gives this cake a stunning finish.
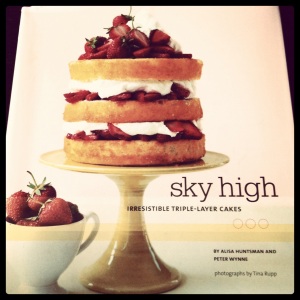
I happen to have three 8-inch cake pans (which are required for all of the recipes in this cookbook). However, if you only have two pans, you can put 2/3 of the batter in one pan, and 1/3 of the batter in the second pan. The pan with double the amount of batter will need to bake longer (approximately 45-55 minutes) and once cooled, can be sliced in half with a serrated knife to form two layers.

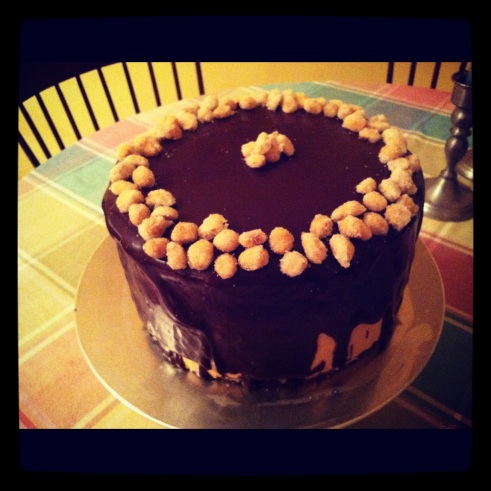
Decorate the top of the cake however you like or leave it the way it is. The chocolate glaze will speak for itself. I candied some roasted peanuts and used them on top of the cake.


Sour Cream-Chocolate Cake with Peanut Butter Frosting and Chocolate-Peanut Butter Glaze

Adapted from Sky High: Irresistible Triple-Layer Cakes
Makes an 8-inch triple-layer cake, serves 12 to 16

Ingredients
2 cups all-purpose flour
2 1/2 cups sugar
3/4 cup unsweetened cocoa powder, preferably Dutch process
2 teaspoons baking soda
1 teaspoon salt
1 cup neutral vegetable oil, such as canola, soybean or vegetable blend
1 cup sour cream
1 1/2 cups water
2 tablespoons distilled white vinegar
1 teaspoon vanilla extract
2 eggs

To make the cakes
Preheat the oven to 350 degrees F. Butter and lightly flour the bottoms and sides of three 8-inch round cake pans and line the bottom of each pan with a round of parchment or waxed paper.  Carefully butter and flour the paper.

Sift the flour, sugar, cocoa powder, baking soda, and salt into a large bowl and whisk to combine them (or use the whisk attachment in a stand mixer). Add the oil and sour cream and whisk to blend. Gradually beat in the water. Blend in the vinegar and vanilla. Whisk in the eggs and beat until well blended. Scrape down the sides of the bowl and be sure the batter is well mixed. Divide among the three prepared cake pans. Bake the cakes for approximately 30-35 minutes, or until a cake tester or wooden toothpick inserted in the center comes out almost clean.

Let the cakes cool in the pans for about 20 minutes before inverting onto wire racks. Let cool completely. If you can, I would recommend freezing (or refrigerating) these cakes before assembling by wrapping the layers very well in plastic. The hard, frozen layers will be a lot easier to work with during assembly as these cakes are a bit crumbly.

To assemble the cake
Place one layer, flat side up, on a cake stand or large serving plate. Spread 2/3 cup of the Peanut Butter Frosting evenly over the top. Repeat with the next layer. Place the last layer on top. Use a small amount of the remaining frosting to create a crumb coat which will lock in any stray crumbs so they don’t show through your frosting. Chill the cake for 15-30 minutes, then frost the cake completely with the remaining Peanut Butter Frosting. Chill the cake for at least 30 minutes.

To decorate with the Chocolate–Peanut Butter Glaze, put the cake plate on a large baking sheet to catch any drips. Pour the glaze over the top of the cake, and using an offset spatula, spread it evenly over the top just to the edges so that it runs down the sides of the cake in long drips. Refrigerate, uncovered, for at least 30 minutes to allow the glaze and frosting to set completely.

Remove about 1 hour before serving. Decorate the top as desired.


Peanut Butter Frosting

Makes about 5 cups

Ingredients
10 ounces cream cheese, at room temperature
1 stick (4 ounces) unsalted butter, at room temperature
5 cups confectioners’ sugar, sifted
2/3 cup smooth peanut butter (do not use all natural peanut butter)

In a large bowl with an electric mixer, beat the cream cheese and butter until light and fluffy. Gradually add the confectioners’ sugar 1 cup at a time, mixing thoroughly after each addition and scraping down the sides of the bowl often. Continue to beat on medium speed until light and fluffy, 3 to 4 minutes. Add the peanut butter and beat until thoroughly blended.


Chocolate-Peanut Butter Glaze

Makes about 1 1/2 cups

Ingredients
8 ounces semisweet chocolate, coarsely chopped
3 tablespoons smooth peanut butter
2 tablespoons light corn syrup
1/2 cup half-and-half

In the top of a double boiler or in a bowl set over simmering water, combine the chocolate, peanut butter, and corn syrup. Cook, whisking often, until the chocolate is melted and the mixture is smooth. Remove from the heat and whisk in the half-and-half, beating until smooth. Use while still warm.
Easy summer cookies

Orange vanilla chip cookies

When someone says they want something “light and fruity” in a pinch, my mind always wanders to these cookies. They are a great summer treat and one of the easiest recipes in my arsenal.

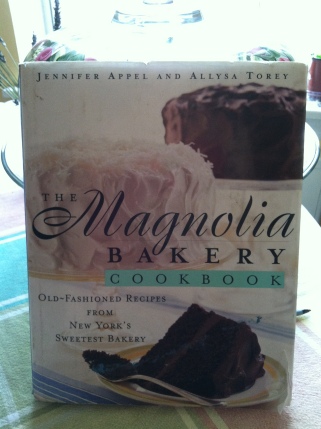
This recipe is from the original Magnolia Bakery Cookbook, in which the author notes it was inspired by a recipe in Country Living and reminds her of creamsicles in the summer. I couldn’t agree more.

This recipe is also a solid base for mixing and matching other flavors. For instance, substitute lime zest in place of orange and tequila instead of vanilla and you’ve got a margarita cookie!

Warning – These will disappear quickly. Bon appétit!

Orange Vanilla Chip Cookies
Recipe adapted from Magnolia Bakery Cookbook

Ingredients
2 1/4 cups all-purpose flour
3/4 teaspoon baking soda
1/2 teaspoon salt
1 cup (2 sticks) unsalted butter, softened
1/2 sugar
1/2 lightly packed brown sugar
1 large egg, at room temperature
1 tablespoon orange zest
1 cup vanilla chips

To make the cookies
Preheat the oven to 350 degrees and line 4 baking sheets with parchment or silpats (or use non stick baking sheets).

Combine the flour, baking soda, salt and zest in a medium bowl and set aside. Using a stand or hand mixer, combine the butter and sugars in a large bowl and cream until smooth and fluffy, about 3-4 minutes. Add the egg and mix well. Add the flour mixture to the butter mixture and beat thoroughly until combined. Stir in the vanilla chips.

Drop by rounded teaspoonfuls onto ungreased, lined cookie sheets, leaving several inches in between. Refrigerate the cookies on the cookie sheets for 10 minutes, then bake them for 10-12 minutes or until lightly golden brown. Do not over bake them.

Cool the cookies on the sheets for 1 minute then remove them to a rack to cool completely.

Summer peach pie

Peach pie

July is the perfect time for summer peaches. I found some fantastic Jersey peaches near Ocean City, NJ, for $1 a pound (not something you can find on the island of Manhattan) and since you need several pounds of peaches for this pie, it was a great find.

The subtle sweet flavor of summer peaches are a great canvas for a pie. I like to keep my peach pie relatively straight forward, as peach juice can easily be overpowered by stronger flavors (save your cinnamon for fall!).

I recently made this pie with an almond crumb topping. I would also be great as a traditional double crust pie. Enjoy!

Summer Peach Pie
Yields one 9-inch pie

Ingredients
One double crust dough recipe, or single crust (if using optional crumb topping recipe below), recipe here
3 pounds ripe local peaches (approximately 10), halved, pitted, and cut into 1/2-inch slices
2 tablespoons light-brown sugar
3 1/2 tablespoons all-purpose flour
1/8 teaspoon nutmeg

To pre-bake the pie crust
Preheat the oven to 425 degrees. Roll out ½ of a double crust pie dough recipe and pre-bake with pie weights for 20 minutes, as directed here. Set aside to cool. Keep oven preheated to 425 while you assemble the pie.

To assemble the pie
Combine the sugar, flour and nutmeg in a small bowl. Sprinkle the dry ingredients over the sliced peaches and gently toss until combine and peaches are coated. Pour the peaches into the prepared pie shell, mounding slightly in the center. Sprinkle the crumb topping over the peaches (recipe below) or roll out the second half of the pie dough, lay over the peaches, vent, brush with egg wash (one egg, beaten with a pinch of salt) and sprinkle with sugar.

Place the pie on foil lined baking sheet and place on a rack in the lower third of the oven. Cover the crust of the pie with foil to prevent it from burning while cooking.

Bake the pie at 425 degrees for 20 minutes, then turn the heat down to 375 degrees and bake for an additional 40- 50 minutes or until the pie is golden brown all over and the filling is bubbling over.

Cool the pie completely at room temperature and store, uncovered (to keep the topping crisp!) at room temperature. Enjoy within 48 hours, or refrigerate for a longer shelf life. Serve it with your favorite ice cream, or this recipe for Sour ice cream.

Crumb topping (optional)
1/2 cup all-purpose flour
1/2 cup light brown sugar
1/4 teaspoon salt
8 tablespoons butter, chilled and cut in pieces
1/2 cup slivered almonds (or other chopped nut of choice)

Combine the flour with the sugar and salt.  Add the cold butter and mix with your fingertips, gently crushing the bits of butter until they are broken into smaller pebbles and the mixture resembles a streusel. Gently toss in the nuts. Refrigerate until ready to use.

Peach pie with sour ice cream

Sour ice cream

Peach pie with sour ice cream

Sounds weird, right? Wrong! Sour (cream) ice cream is velvety smooth and a perfect complement to sweet desserts.

I needed something tart to accompany a sweet peach pie and wanted to go beyond popular flavors like crème fraisch to try something different. As it turns out, sour cream freezes well due to its high fat content and tastes divine.

After some googling and kitchen experimenting, I have an incredibly easy, flavor-packed recipe to share. No crème anglaise, no eggs, no forethought. You just need a blender, a few hours, an ice cream maker and viola!

I recently paired this ice cream with a summer peach pie (recipe coming this week!), however, you can pair it with any sweet pie, including blackberry, blueberry or apple in the fall.

Sour Cream Ice Cream
Adapted from Gourmet magazine, July 2009

Ingredients
1 16 oz container of sour cream (do not use reduced fat)
1 cup half-and-half
3/4 cup sugar
1/2 cup heavy cream
2 teaspoons fresh lemon juice
1/2 teaspoon pure vanilla extract
1/4 teaspoon salt

To make the ice cream
Combine all ingredients in a blender and puree until the mixture is smooth and the sugar has dissolved. Chill the ice cream base in the refrigerator until very cold (at least one hour), then freeze according to manufacturer’s instructions.

Sweet cherry pie

Cherry pie

I love summer pies. From early summer berries to juicy stone fruit, there are so many options. I was contemplating what to make for a Fourth of July barbeque and realized I had never made a cherry pie. It sounded like a fun and festive challenge.

What I love about cherry pie is that the cherries hold their shape nicely throughout the cooking process. This pie won’t look like a mushy mess when you cut into it. The cherries cook through and release their juices without falling apart, making it a very attractive slice. Since cherries are a relatively juicy fruit, this double bake method works well for the crust.

A cherry pitter is a great tool to have, but it won’t save you the mess of cherry juice.  Pitting them by hand works just fine, especially if you’re lucky enough to have a volunteer who will split the task with you (thanks Tom!).

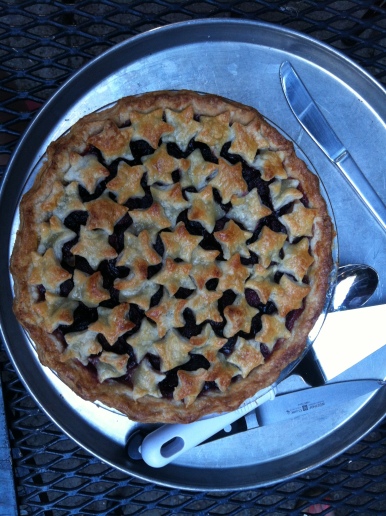
This is a great base recipe for you to play around with. Consider adding in another flavor you love, such as ginger, kirsh, almond extract, lemon zest, etc.  I went with a stars theme for the Fourth of July, but you can do a full top crust, lattice crust, or use any cookie cutter to cut out shapes and decorate the pie anyway you like.

Bon appétit!

Sweet Cherry Pie
Yields one 9-inch pie

Pie Ingredients
1 double crust pie dough separated into two disks, recipe here
5 cups fresh sweet cherries, pitted (about 2 ½ – 3 pounds unpitted)
4 1/2 tablespoons cornstarch
3/4 cup sugar
1/4 teaspoon salt
2 teaspoons of lemon juice
1 tablespoon cold unsalted butter, cut into small pieces
1 egg, beaten with a dash of salt
Sugar in the raw (or regular refined sugar), for sprinkling

To pre-bake the crust
Preheat the oven to 425 degrees. Roll out one disk of pie dough (1/2 the recipe) and pre-bake with pie weights, as directed here. Set aside to cool. Turn the oven down to 400 degrees.

To make the pie
Stir together the cherries, cornstarch, sugar, salt and lemon juice gently in a large bowl, set aside.

Once the pie crust is out of the oven, remove the pie weights and spoon in the cherry filling. Dot the top of the filling with small pieces of cold butter. Roll out the remaining disk of dough (or cut into shapes and lattice crust) and place over the filling, crimping the edges as desired. Make sure to vent the top crust with a couple of slits or openings. Brush the top of the pie with the egg wash and sprinkle with raw sugar.

I would recommend covering the crust of the pie with foil, like this, to prevent it from burning while cooking. You can choose to add the foil now, or keep an eye on the color of the crust and add the foil once its reach a desired golden brown color. I prefer the latter.

Bake the pie at 400 degrees for 25 minutes, then reduce the temperature to 350 degrees and bake for another 25 – 30 minutes, or until the crust is golden and you can see the filling bubble up. Remove the pie and cool completely on a rack.